


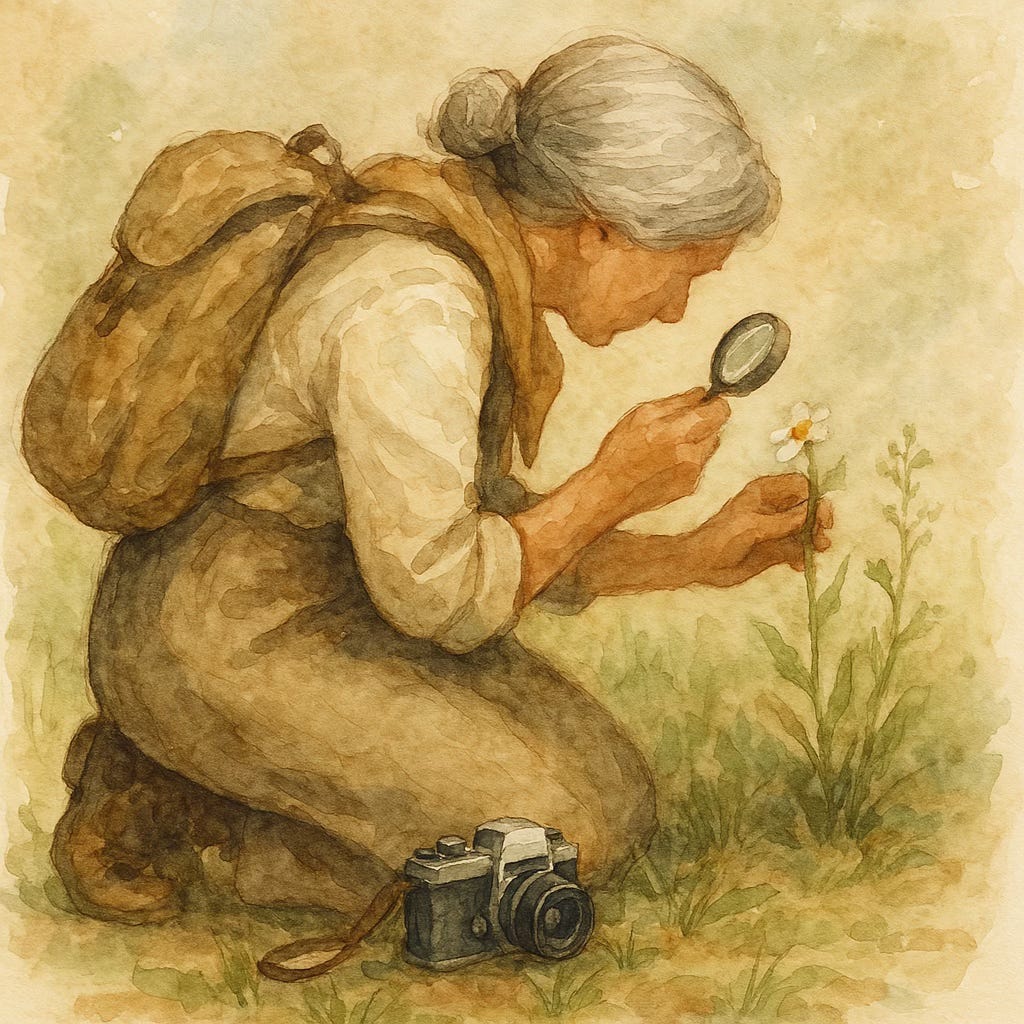
"I want to be a Naturalist"
6 April

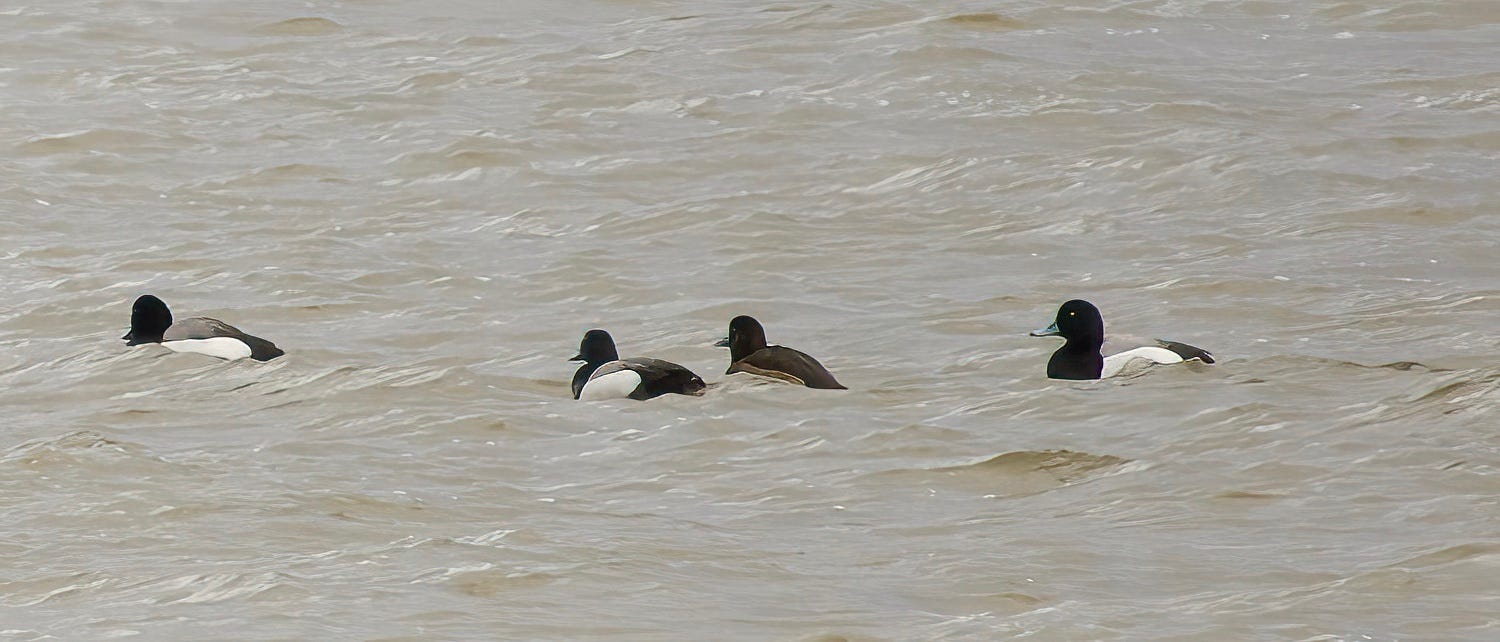
LAST WEEK started with some excitement - Cowbird, Grackle, several SOSPs and there was that beautiful Hawk disassembling and eating a Song Sparrow three feet from my window (link below if you missed it). Very, very slowly, interesting things are starting to happen. There are waterfowl on the open river. We also had what is hopefully the last snow, and more than enough rain, which knocked things back slightly - but that is fairly usual for this seasonal period of transition. The garden bunny has found its annual snack of purple crocus flowers to neatly deflower. The seasonal cycle continues.
https://1001species.substack.com/p/death-of-a-song-sparrow
While we wait for this stuttering start to speed up and the real excitement to begin, now might be a good time to make sure you are ready for the challenges ahead. So …
Anyone with an interest in nature can call themselves a naturalist. Some pursue their interests professionally (e.g., as biologists or environmental scientists), while for most others it is a hobby characterized by observing wildlife, keeping personal records and more and more often, participating in citizen science projects with a commitment to understanding and preserving our environment. I know from questions that come my way however, that many find it hard to move beyond simply “liking nature” to a deeper involvement and understanding. They ask …
“I want to be a Naturalist. For example, how do I identify birds?”
I confess to not being the best bird identifier, though I think I can do better than many and bluff my way quite effectively … I have poor hearing and am functionally blind in one eye (invisible disabilities), but for all that I have been around long enough to get asked by people if I could give them some tips on how to get started on birding or botanising or whatever takes their fancy. They will start by picking up a field guide and flipping through the several hundred pages and illustrations and it all seems too daunting.
Time, experience and simply asking birders you meet in the field are the solutions - perhaps join a birding club that runs regular field trips (Bird Protection Quebec if you live in the Montreal area) because birders love to help others get their identifications right. We are a friendly bunch.
The basic thing is to not get overwhelmed - try to simplify the essentials. It all it becomes easier with practice.
Start here …
Keep Notes
It probably seems obvious, but carrying a notebook when outside is a good habit to get into. Simple notes about interesting things you have seen and identified, a few sketches if you can manage them, will be a very useful aide memoire in the future.
Field Guides
Get a reliable field guide - I suggest the one by Sibley or National Geographic if you live in North America. Both do separate editions for east and west of the continent. In Europe you want the splendid Collins Bird Guide - it is superb.
Then, install on your phone the Merlin bird identification app. It’s not infallible, nothing is, but it is often surprisingly accurate and will suggest species to you from visual appearance and also from the songs you hear. Don’t assume it is always correct but you can be pretty sure it is going to give you a half dozen sensible suggestions that you can narrow down with your field guide.
https://www.allaboutbirds.org/guide/merlin/id
Observe the Overall Shape and Size:
Note easy things like the bird's body shape and size. Is it small like a sparrow, mid-sized like an American Robin, large like a Hawk or enormous like a Turkey? Is it round, elongated, or chunky? What is the predominant color? These general features help to narrow down the type of bird, such as a sparrow or a hawk. The Merlin app mentioned below uses these criteria to help you.
Look for Field Marks:
These are distinctive features specific to a given species like color patterns, stripes, or patches - these are known as field marks. For example, the Northern Harrier has a white rump patch, Dark-eyed Juncos have white outer feathers on their tails.
Consider Color Patterns: Note the colors and patterns on different parts of the bird, like the head, back, and belly. Make notes to consider later if you are still struggling.
Behavior and Habitat: Observe how the bird behaves and where it is found. Some birds are known for specific behaviors or habitats, which can aid identification. In a tree, on a marsh, swimming, in the open or in woodland etc.
Use Field Guides: After observing these details, consult a field guide to match your findings with known species. Always look at the distribution map.
Where do you see them?
Field, woodland, on the ground, perching in a tree, beside a river or marsh etc. All species have their preferences.
Ask questions
Don’t be embarrassed - if there is someone nearby looking at birds too then ask them for help.
Practical example
Mental exercise - compare two similar birds side by side. For example, how to distinguish between a Song Sparrow and a Fox Sparrow, two sparrows that at first glance are quite similar. Focus on size, plumage, and behavior. It’s easy when you see them together … though you almost never will in the real world.
Size and Shape: Fox Sparrows are larger, stockier, and more round-bodied compared to the smaller, slimmer Song Sparrows. Fox Sparrows also have stout bills and shorter tails, while Song Sparrows have longer, rounded tails.
Plumage: Fox Sparrows have rich reddish or rusty (terracotta colored) streaks on the upperparts and heavily streaked underparts that often form a central spot. Their streaks can resemble inverted "V"s, and they may have a white eye ring.
Song Sparrow: Coarse streaks on the breast converge into a central spot. They often have russet stripes on the crown and through the eye, with a grayish face.
Finally, what are they doing? Both species forage by scratching leaf litter with both feet together - but Fox Sparrows will most likely be in dense thickets, while Song Sparrows are more usually in the open and to be near water or wetlands.

Binoculars
Some naturalists don’t have binoculars and do fine, but for birds and mammals at a distance they are invaluable. Botanists, you can skip this bit - your subjects allow you to get close and they don’t fly off when they see you.
You can spend from $100 to over $3000 for binoculars and this is very much a situation where you get what you pay for. The best optics gather more light and so are useful at dawn and dusk and they are sharp from edge to edge with no colour fringing. You can also expect that if you drop them or bang them against a rock they will not easily go out of alignment, whereas cheaper ones are less robust. Having said that, there are quite a few mid-range options that are excellent value. What I would say is that you should find a specialist store that will let you try them out and help you to choose. You cannot beat having them in your hand to know if they are going to be good for you.
Read this before spending a cent: https://www.audubon.org/gear/binocular-guide
Choosing good binoculars for birding at a reasonable price involves balancing features, quality, and budget.
Magnification and Lens Size: Opt for 8x42 binoculars, which provide a good mix of magnification and brightness. They offer a wide field of view, making it easier to track birds in flight.
Optical Quality: Look for models with sharp, bright optics and true-to-life color rendition. Bright image, in focus from edge to edge of the field (no fuzzy bits at the edges) and no colour fringing around features … poor lenses may cause you to see a narrow band of colour around them, often shades of red. Don’t waste your money if you see that.
Durability: Waterproof and fog-proof binoculars are ideal for outdoor use. Lightweight models are easier to carry during long birding trips.
Comfort: Check for ergonomic designs with comfortable grips and eyecups, especially if you plan to use them for extended periods.
Join a Club
An unbeatable way to learn about wildlife is to join a club that organizes talks and field trips where you can learn from more experienced naturalists. If birds are of particular interest to you at all then I would point you in the direction of Bird Protection Québec. This organisation is a registered charity, in fact the oldest bird conservation charity in Canada. It has on-line talks monthly in the winter months and field trips most Saturday mornings - plus, the field trips are free, you don’t have to be a member to go along though, of course, everyone hopes you will join in due course. Birders always welcome newcomers and the BPQ people will be only too pleased to see you and answer your questions.
Find out more at https://pqspb.org/bpqpoq/
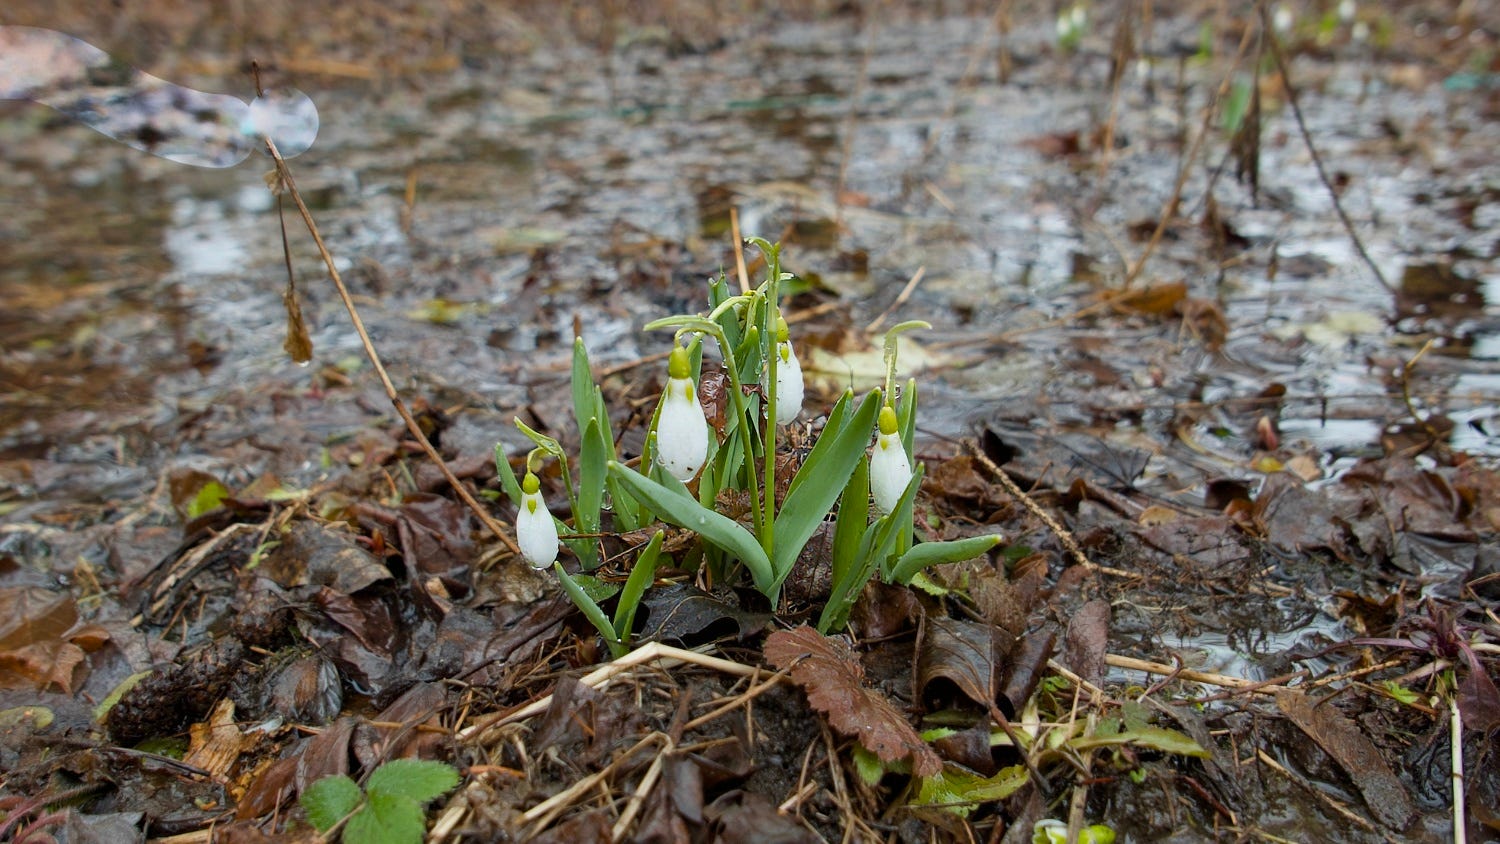
Plants
You can always photograph a plant so put the iNaturalist app on your phone. It has excellent AI image identification and keeps records of what you have seen.
The best printed ID guides to plants are ones set out as dichotomous keys, but they are hard for beginners not familiar with botanical terminology to use. A couple of good printed guides for the average person are Clemants and Gracie’s Wildflowers in the Field and Forest (our favourite) and Newcomb’s Wildflower Guide.
Talking about matters botanical … I read an article a couple of days ago about the most toxic plant in New Zealand. I know this is diverting from the main topic of today’s newsletter but follow me down this rabbit hole, if you will. It’s quite fascinating. Here is the link:

Right, out of the botanical rabbit hole … let us continue:
Insects
Again, use the internet. All the useful information has moved there. The exceptions being butterflies and moths for which I recommend Peterson for moths and Evans Field Guide to Insects and Spiders of North America for everything with six or eight legs. Be aware that while some insects are easy to identify to species level a huge number are not and you have not failed if you can’t get past genus or family. Why? Because the distinguishing features of some species need a microscope to see - such things as they shape of their genitalia or the number of hairs on a leg.
Take Photographs if you can
For most naturalists, most of the time, it’s just nice to have record shots of flowers and trees and insects and birds that have caught your eye. All the more so if you cannot confidently identify them in the field because you then have a visual record to work with when you return home and can make use of your field guides and the internet.
“Everyone” has a phone with a camera and today’s phone cameras are remarkably good. Certainly more than good enough for subjects like plants that stay still and you can get close to. Rather less useful for relatively distant birds and butterflies though you might be surprised at what can be achieved if the occasion demands it. Very briefly, look at the following options:
A pocket camera such as a smartphone or a small “point and shoot” camera. Small, not too expensive and easy to slip in a pocket. From experience, I have found the Sony Cybershot RX100 series of cameras and the Canon Powershot G9 camera to be excellent for wildlife recording. Both have the ability to zoom in a bit and get details on flowers and insects and have large enough sensors for you to be able to crop and enlarge details when you are at your computer.
A Bridge camera. These are all in one cameras of moderate size. Some have surprisingly competent zoom abilities and give you the possibility of getting those fabulous epicures of birds that you really want. My camera of choice is the Sony RX10 which has a large enough sensor and a lens by Zeiss that zooms to 600mm equivalent when needed. Also, it does good macro photography and is excellent for insects. Nikon have a comparable bridge camera that is good for distant wildlife … actually it has a longer zoom range than the Sony but the sensor is a lot smaller so detail in low light is not as good.
Mirrorless interchangeable lens camera bodies. The sky is the limit here for price depending on how deep your pockets are … I won’t go into detail, there is plenty of information on the internet, but cameras by Sony and Canon are generally favoured by advanced wildlife photographers.
Whatever camera you use, make sure that you understand the controls and be prepared to do some post-processing on your computer. Pixelmator Pro and Affinity Photo are very good software packages for turning that camera image file into something you will be proud of and a fraction of the cost of Adobe Photoshop. There is also GIMP, which is an open source, free image editing software.
Do make sure to set your camera to record images in RAW format - the internet will tell you why that matters for the very best quality. At least set it to capture RAW + JPEG so you have the RAW files just in case you have a special image you want to make the most of.

"In every walk with nature one receives far more than he seeks."
— John Muir
Great advice! And yes, it is true that most insects need to be identified using a microscope. However, I would encourage people who can to go get a microscope! In the old days, it was common for 'amateur' entomologists to describe species and make real contributions to the science. A lot of the technical literature has also been scanned and is available online for those who want learn! A great resource is https://www.biodiversitylibrary.org/.
I just installed Merlin, a free bird ID app from Cornell University with an add on specific to my location in SW Queensland. Looking forward to learning more about the birds I’ve been watching here.